Most paint jobs that look bad after a year weren't victims of cheap paint or bad colour choices. They failed because the walls weren't ready. It's the step that's easiest to skip and the one that matters most.
After 10 years of interior painting in Toronto and across the GTA, Alessio at DC Painting has seen it firsthand: the jobs that hold up are the ones where the prep was done right. That means cleaning the walls properly, fixing what needs fixing, choosing the right primer, and not rushing any of it.
This guide walks you through exactly what to do before you open a single can of paint. Whether you're freshening up a bedroom in North York or giving your whole main floor a refresh, the process is the same. Take the time here and the paint job takes care of itself.
Why Wall Prep Makes or Breaks Your Paint Job
What Happens When You Skip Prep
The short answer: the paint fails early. Industry research suggests that poor surface preparation is responsible for roughly 80% of premature paint failures — meaning most peeling, cracking, and bubbling you see on walls isn't a product defect, it's a prep problem.
Paint won't stick properly to dirty, greasy, or glossy surfaces. It won't cover cracks and holes — it'll just highlight them. Skip the primer on bare drywall and you'll end up with blotchy, uneven absorption that no second coat will fix. These aren't worst-case scenarios; they're what happens on a regular basis when prep gets rushed.
How Long Does Prep Actually Take?
For a standard bedroom, expect prep to take at least as long as the painting itself — sometimes longer. On professional jobs, it's not unusual for prep to account for the majority of the total project time. That's not inefficiency; that's how a paint job lasts 7–10 years instead of 2–3.
If you're doing it yourself, plan for a full day of prep before you pick up a brush. Rushing this phase is the single most reliable way to end up repainting sooner than you wanted to.
Step 1 — Clear the Room and Protect Your Space
What to Move and What to Cover
Get as much furniture out of the room as you can. For anything too heavy to move, push it to the centre and cover it with drop cloths. Use canvas drop cloths on the floor — not plastic. Plastic gets slippery, doesn't stay put, and paint spills stay wet on it, meaning they get tracked through the house.
Remove outlet and switch covers and turn off the circuit breaker to the room before you do. Keep the screws taped to the back of the plates so you're not hunting for them later. Cover any door hardware and light fixtures with painter's tape or plastic bags. It takes ten minutes and saves you a lot of cleanup.
Step 2 — Inspect Your Walls Before Anything Else
How to Spot Holes, Cracks, and Drywall Damage
Before you clean or patch anything, do a proper inspection. Take a work light and hold it close to the wall surface, moving it slowly up and down. The raking light will throw shadows across imperfections you'd never see under normal room lighting — small dents, nail pops, hairline cracks, and low spots. Circle anything you find with a pencil.
Also check around window and door frames, where cracks from settling are common. In older Toronto homes, plaster walls can have larger, deeper cracks that need more than a simple spackling job. If you're seeing structural cracking or significant drywall damage, that's worth getting looked at before you paint over it.
What to Do About Peeling or Flaking Old Paint
Painting over peeling paint doesn't fix it — it buries the problem until it resurfaces through the new coat. Scrape away all loose and flaking paint with a putty knife before you do anything else. Then lightly sand the edges of the scraped areas so there's no hard lip between the bare patch and the surrounding painted surface.
One more thing: if your home was built before 1978, there's a chance you're dealing with lead paint. Test with a lead paint test kit before scraping — especially in older homes in Toronto's established neighbourhoods. This is one of those situations where calling in a professional makes sense.
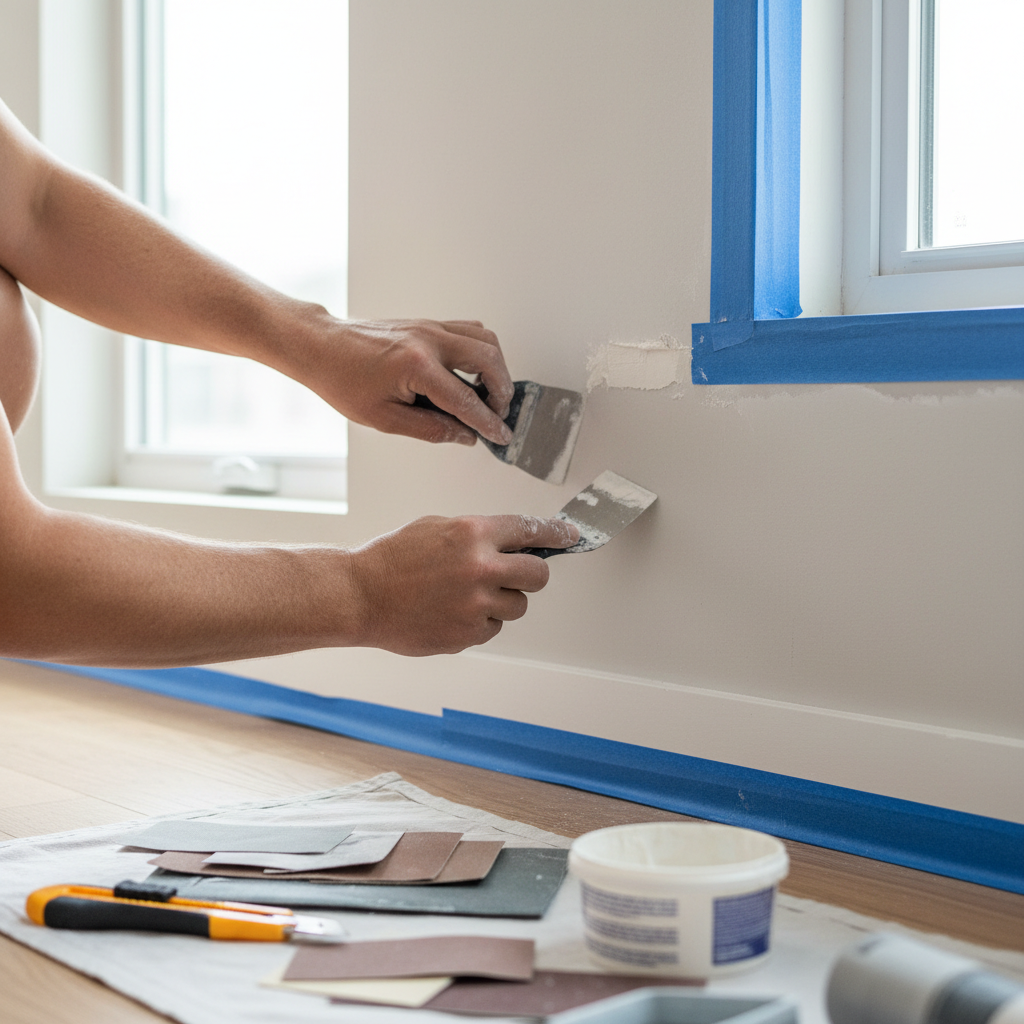
Step 3 — Repair, Fill, and Sand
Patching Small Holes vs. Larger Drywall Repairs
For small nail holes and minor dings, a lightweight spackling compound does the job. Apply it with a putty knife, overfill slightly, and once it's dry — usually one to five hours depending on humidity — sand it smooth with 150 to 180-grit sandpaper.
For holes larger than a few centimetres, you'll want a self-adhesive mesh drywall patch first. Apply it over the hole, then skim joint compound over the patch in layers, feathering the edges out 20–30 cm beyond the patch. Let each coat dry fully before adding the next. Trying to rush drywall repair is how you end up with visible bumps and ridges under the finished paint.
For anything bigger than that — or if you're dealing with significant plaster damage — it's worth calling someone in. DC Painting handles drywall repair and renovation work alongside painting, which is exactly why prep like this doesn't get skipped on our jobs.
Sanding Tips for a Smooth Surface
You don't need to sand every wall from floor to ceiling. In most cases, a light pass with 150 to 200-grit sandpaper is enough to knock down any surface roughness and give the paint something to grip. Anything under 100-grit is too coarse for walls — it'll scratch the surface rather than smooth it.
After sanding, wipe everything down with a slightly damp cloth to remove the dust. Sanding dust left on the wall is one of those invisible problems that shows up clearly once the paint goes on.
Step 4 — Clean Your Walls Properly
The Right Way to Wash Walls Before Painting
Paint needs a clean surface to bond to. Dust, grease, and grime act as a barrier between the paint and the wall, which leads to poor adhesion and early peeling. Wipe walls down with a lightly dampened sponge and a mild detergent, working from the bottom up to avoid drips running down dirty sections.
For previously painted walls with oily or glossy surfaces, a deglosser or heavy-duty pre-paint cleaner applied with a lint-free cloth works better than soap and water alone. It breaks down the surface enough to give the new paint something to grip.
Whatever you use, let the walls dry completely before moving on. Applying primer or paint to damp walls is a reliable way to end up with blistering.
What to Do in Kitchens, Bathrooms, and High-Traffic Areas
Kitchen walls pick up grease and cooking residue over time, even when they look clean. Use a grease-cutting detergent here and rinse with clean water afterward to remove any residue from the cleaner itself. Same approach for bathroom walls — and if there's any mildew present, treat it with a diluted bleach solution before painting. Never paint over mildew; it'll grow straight through the new coat.
Around light switches, door handles, and baseboards, use a slightly stronger clean. These are the spots that get touched constantly and build up grime fastest. Missing them is one of the more common reasons a fresh paint job starts showing wear too soon in high-traffic areas.
Should You Prime Before Painting?
When Primer Is Non-Negotiable
Primer disguises imperfections, creates a consistent surface for paint to bond to, and ensures a uniform finish — especially on porous or stained surfaces. There are situations where skipping it will cost you.
Primer is non-negotiable when:
- You're painting over new or bare drywall
- You've patched or spackled areas (prime those spots at minimum)
- There are water stains, smoke stains, or marker marks on the wall
- You're making a significant colour change — especially going from dark to light
- You're painting over a glossy or oil-based surface with a latex paint
For water stains and permanent marker, use a stain-blocking primer specifically. Regular primer won't be enough — those stains will bleed through.
When You Can Skip It
If the walls are in good condition, already painted, and you're doing a similar colour update, you can often get away without a separate primer coat — especially with modern paint-and-primer-in-one products. That said, two coats of finish paint will almost always give you better results than one.
The rule of thumb: when in doubt, prime. It takes an extra few hours and adds relatively little to the overall cost. What it adds to the longevity of the paint job is worth it. For roller application, use a 3/8" to 1/2" nap roller for smooth walls and a 1/2" to 1" nap for textured surfaces to get proper coverage.
What Should You Do If You're Not Sure the Walls Are Ready?
This one comes up a lot. The walls look okay but not great — maybe there are a few patched spots, some older stains, and you're not sure if you've cleaned thoroughly enough. Here's what to check before you commit to painting:
- Run your hand across the surface — it should feel smooth and consistent, with no gritty patches or dusty residue
- Do the raking-light test one more time — this is harder to do once the room is set up for painting
- Check that all patched areas are fully dry and sanded flush — they shouldn't be noticeably raised or recessed
- Make sure you can't smell cleaning residue — if you can, the wall likely needs another rinse and dry
If something still seems off, the answer is almost always to address it before painting — not hope the paint covers it. In most cases, what's visible before paint goes on will still be visible after.
And if you're looking at a full interior painting project — multiple rooms, significant patching, or older walls that need more attention — it's worth having a professional take a look. An experienced painter will spot things that are easy to miss and can tell you upfront what the walls need before a brush touches them.
The Bottom Line
Good interior painting starts long before the paint comes out. Clear the room, inspect the walls carefully, repair what needs repairing, clean the surfaces properly, and prime where it's needed. Do those things well and you'll get a finish that actually holds up — not one that looks great for a few months and starts peeling by spring.
It's not complicated work, but it does take time and attention. If you're tackling a smaller project, this guide gives you what you need to do it right. For bigger jobs — full interiors, older homes, or walls that need real repair work — DC Painting handles all of it. We're licensed, insured, and owner-operated, serving Toronto and the GTA with 10 years in the trades.
Reach out for a free estimate and we'll tell you exactly what your walls need before we start.